🧐 Things you will need throughout the process
- An Apple ID that isn’t linked to a developer account
- D-U-N-S number (company only)
- Your company information (company only)
- A person with authority to sign legal contracts (company only)
- A credit card ($99)
⏱ Estimated duration
- Between 5 days and 3 weeks
The correct way of doing this is creating a 'company account', for that you need to request a D-U-N-S number, the entire process will take 2 to 3 weeks. If you already have a D-U-N-S number or aren’t a company, the entire process usually takes about 5 days, sometimes less. Do make sure to request an Apple Developer account a lot earlier than you want your app to go live in the App Store! If Apple rejects your request, for whatever reason, you may be in for some slow back-and-forth communication.
In this how-to guide, we’ll be setting up an Apple Developer account using our other portfolio company, Spencer, as our example case.
1. Creating an Apple ID
If you already have an Apple ID that isn’t linked to a developer account, you can skip this step.
Go to https://appleid.apple.com/account to create a new Apple ID. Fill out all the requested personal information and the 3 security questions, and continue.
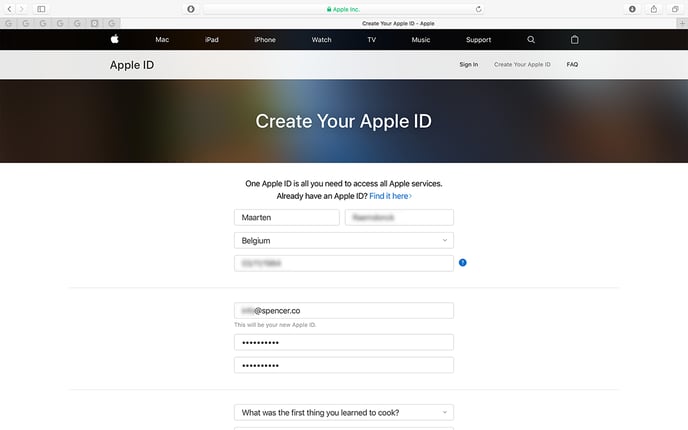
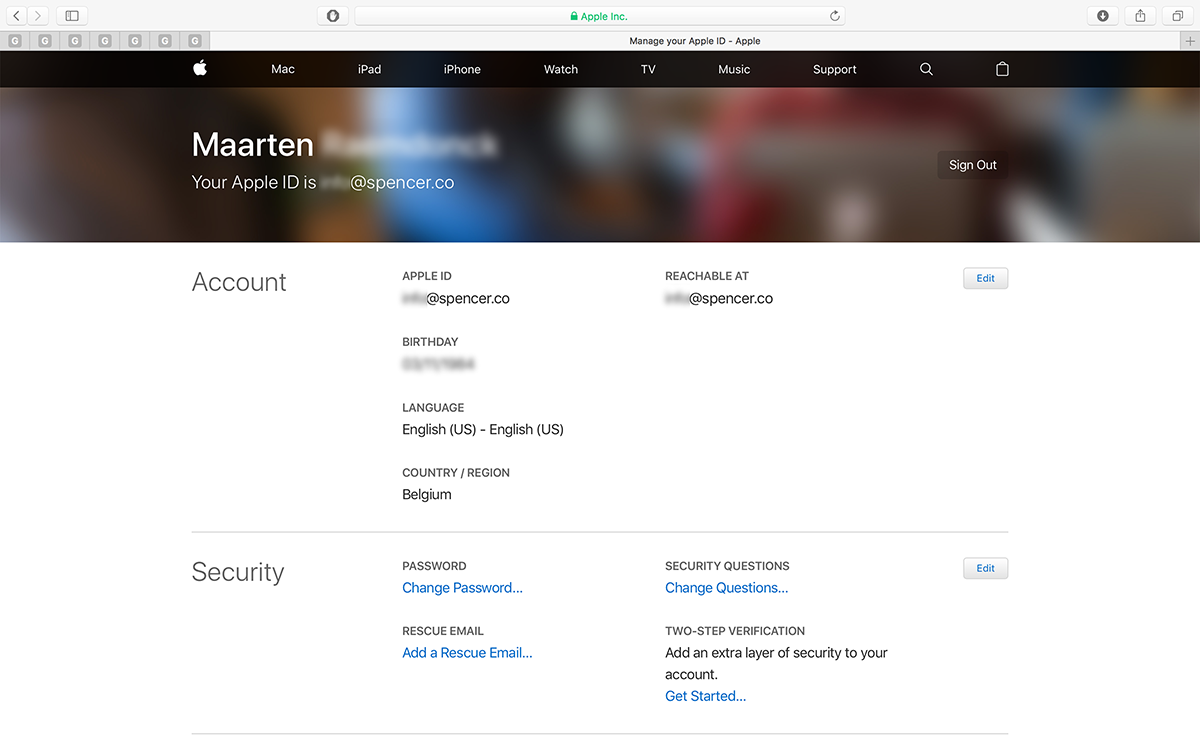
You should now be able to log in using your Apple ID.
2. Requesting a D-U-N-S number
If your company is a one-person business, you can skip this step.
For companies and educational institutions, a D-U-N-S number is required to sign up for an Apple Developer account. A D-U-N-S Number is a unique nine-digit number that identifies your organization as a legal entity. If your organization doesn’t already have a D-U-N-S number, you need to lookup or request here:
You will need to enter some (legal) information about your business, such as an address, contact information, CEO details, number of employees, etc. It’s important to note here that the legal company name you fill out for the D-U-N-S number will also be the name Apple uses for your Developer Account and the name that will appear when you place apps in the App Store. If your company’s legal name and brand name aren’t the same, the only way to change this is by contacting Apple Support once your Developer Account has been created and approved. Normally, they will update the account name for you, free of charge.
🚨 It can take up to 14 business days before the D-U-N-S information is passed on to Apple, so don’t postpone this step.
3. Apple Developer Program Enrollment
Once you have received your D-U-N-S number, you can start your actual enrollment in the Apple Developer Program. Browse to https://developer.apple.com/programs/enroll/, scroll down and click ‘Start Your Enrollment’.

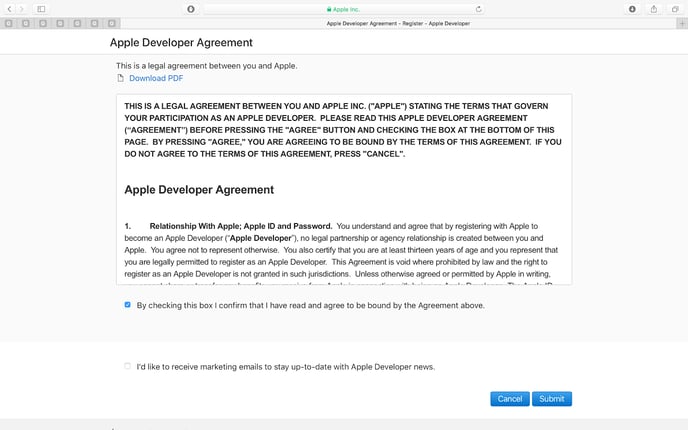
If you are not already logged in, you will be asked to sign in with the Apple ID you created in step 1. If you have never signed in to Apple’s Developer portal with your Apple ID, you will be asked to read and agree with the Apple Developer Agreement. Once you have, click ‘Submit’ to continue.
On the following page, you will be asked whether you are an individual or single-person business, a company (preferred by us), or a government organisation. As mentioned above, as a company you will need a D-U-N-S number. Select the option that applies to you and click ‘Continue’.
.png?width=512&name=unnamed_(1).png)
The next step is the approval by Apple to the Developer Program. For that, you’ll have to provide some contact information and confirm that you are either the owner of the company or you have the authority to sign legal agreements.
.png?width=512&name=unnamed_(2).png)
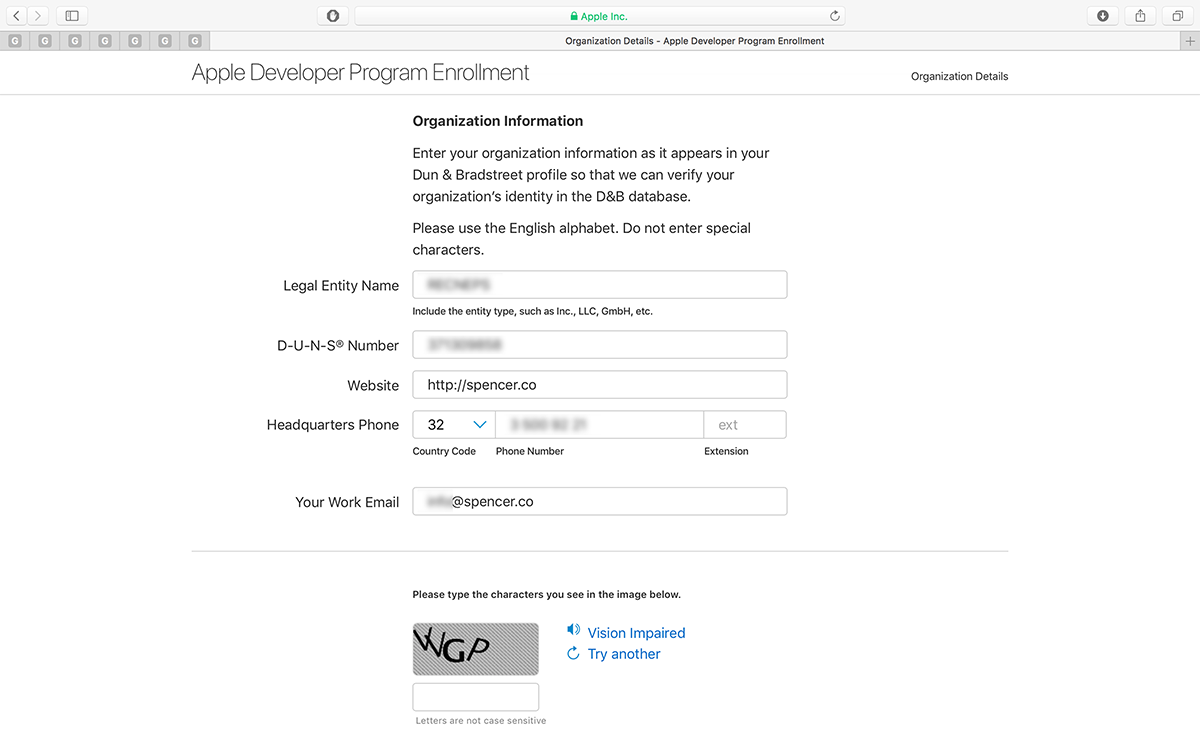
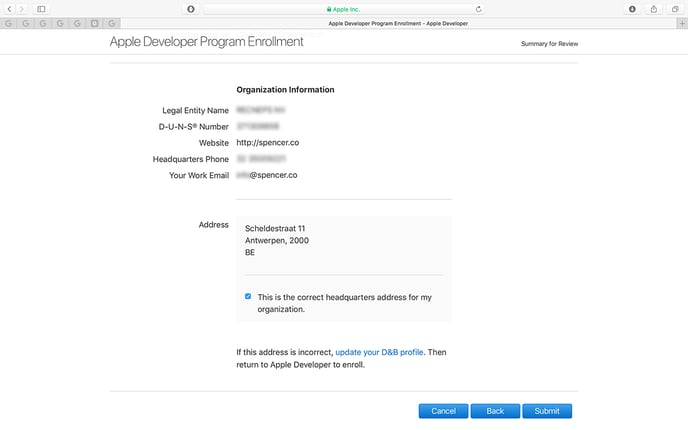
Next, you are required to enter some information about your organisation, such as the legal name and the D-U-N-S number (which have to match).
On the next page, you will see a summary of all the information you just entered. Review all the info, confirm that the address linked to the D-U-N-S number is correct, and click ‘Submit’.
If all information was validated by Apple, you will see a message that the enrollment is being processed. That’s all you can do! Now you just have to wait for Apple to review the request and approve or reject it.
Request approved/rejected
Should your request be ❌ rejected, you will receive an email explaining the reasoning behind the decision – however, you’ll not always get an explanation of what steps are required to be approved. While you could reply directly to the rejection email, you’ll have faster results by simply calling the phone number that’s included in the email. Mention your case number and ask for a detailed explanation of the steps you need to take to rectify the situation.
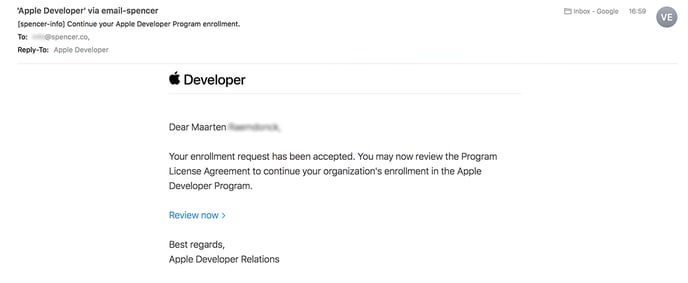
If your request has been ✅ approved, you will receive a phone call from an Apple employee on the number you entered before. This person will want to talk to the founder/CEO of the company to confirm the information you entered during the enrollment process. After this phone call, you will immediately receive an email with a link allowing you to continue the enrollment process.
This time you will be asked to read and agree with the Apple Developer Program License Agreement. Once you have, click ‘Continue’ to proceed.
.png)
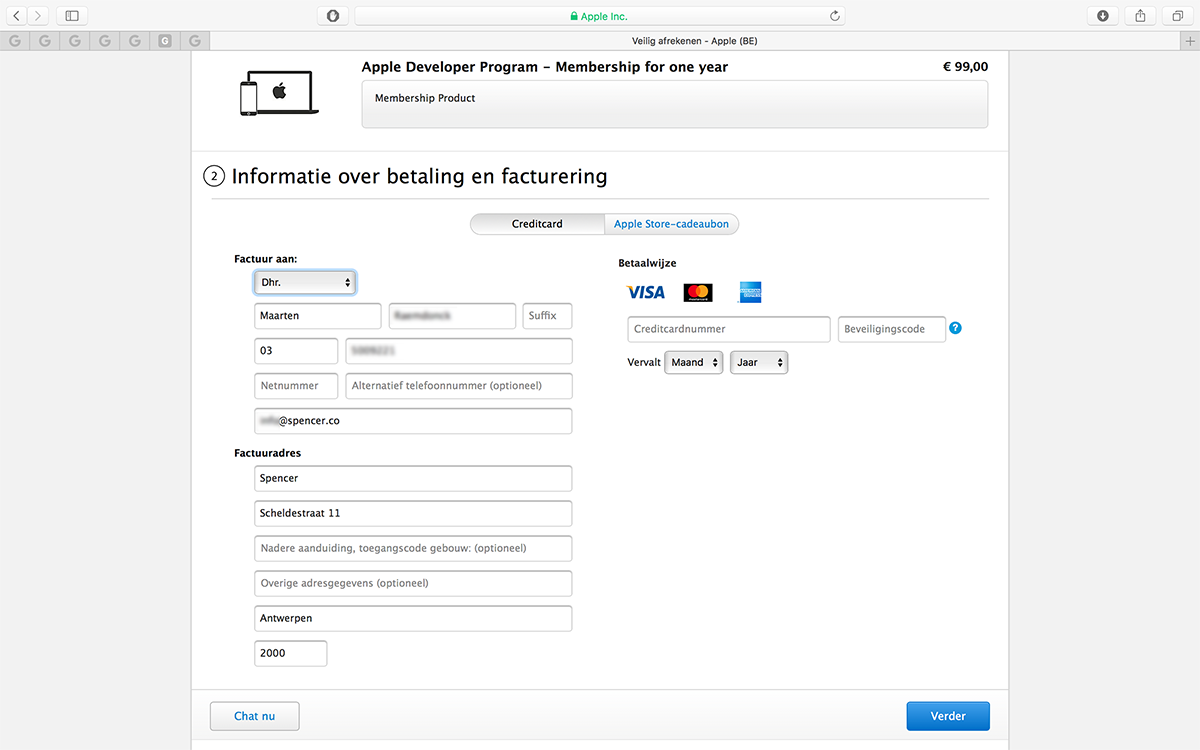
On the next page, you see an overview of the membership purchase and are given the option to automatically renew the membership each year. Choose whatever option you prefer and continue.
You will now be redirected to the Apple Store website of your country for checkout. Fill in your contact information once again, add the credit card you want to use, and continue.
Once the checkout has been completed, your brand new Apple Developer account will now be pending until the purchase has been processed by Apple. This can take up to 48 hours.
During this time, you can log in to Apple Developer, but you will not be able to add any application IDs, certificates, or anything else that is required to prepare your app for the App Store. As long as your account is pending you will also not be able to log in to iTunes Connect yet.
.png)
Once your purchase has been processed, you will receive yet another mail, welcoming you to the Apple Developer Program and to iTunes Connect. 🏁
4. Adding Appmiral to your AppStore Connect
To allow Appmiral to submit the application to the App Store for you, you will need to grant us access to AppStore Connect. To do this, Appmiral needs to be added as an AppStore Connect user.
In iTunes Connect, in the top left, select My Apps. In the popup that appears, select Users & Roles. Then click the + icon to add a new iTunes Connect user.
.png)
- In the First Name text field, add “Hello”
- In the Last Name text field, add “Appmiral”
- In the Email text field, add “hello@appmiral.com”
- Click the Next button to continue.
.png)
🚨On the next screen, you will need to select the user role for Appmiral.
To enable us to create the App in AppStore Connect and upload it, you need to select the Admin role. Click the Next button to continue.
Important to enable us to upload the Certificates for activating the Push Notifications.
This is how you do it :
- go to App Store Connect
- select Users & Access
- open the hello@appmiral.com account
- under Developer Resources, enable the checkbox Access to Certificates, Identifiers & Profiles - See picture below!

✅ Woohoo, your Apple Developer Account is now ready to submit your application.