Step 1: delete the old application from your device
Step 2: check the manuals below for iOS or Android
Delete the old application (from last year) from your device !!
1. Installing a test build on Android
1.1 Open the invite email
If you are a new tester or have never installed a test build before, you will first receive an invite email. This email will contain the name of the application and indicate that it is for the Android platform.
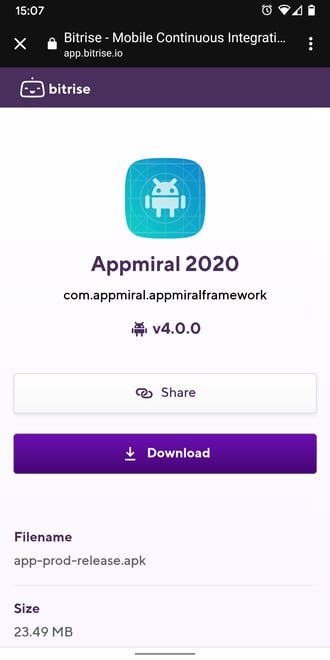
1.2. Download the application
Simply tap the 'Download' button to continue. The logo on the top of the screen will show the progress of the download.
1.3. Install the application
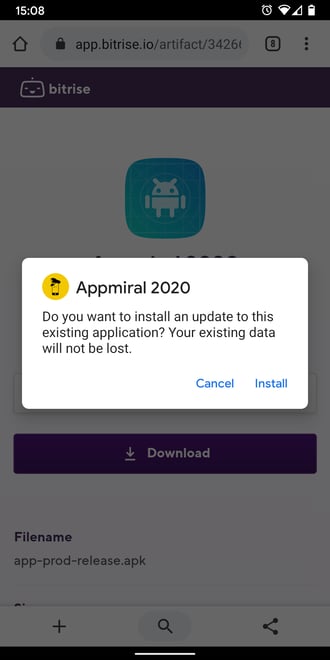
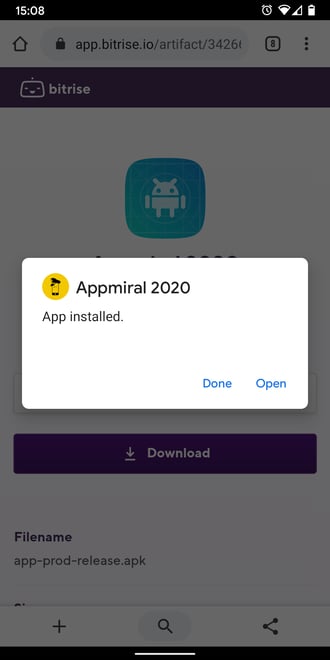
After the download has completed, you should be automatically redirected to the following screen. After tapping on the 'Install' button, the application will now be installed.
2. Installing a test build on iOS
Apple now requires all test applications to be distributed via TestFlight.
This approach significantly simplifies the testing process for you, as it eliminates the need to install a certificate on your device and to restart it.
The TestFlight build is identical to the live app in terms of functionality and behavior. Within this test build, you will be able to validate the following features, which before wasn’t possible in test applications:
- Push notifications
- Background location updates
- Whenever a new TestFlight version becomes available, you will automatically get notified when a new version is available.
There are two scenarios on how to install a TestFlight application.
⚠️ If you still have an older version of the application installed on your device (for example, from a previous edition), please uninstall it before proceeding.
2.1 Scenario 1: External Testing Group
- Download the app ‘TestFlight’ on the App Store
- Navigate to the Project Status page in your CMS on the right edition
- Scan the QR code next to the Apple icon
- Open the link next to the Apple icon
- Simply tap the 'Install' button to continue. You will receive a system popup asking you if you want to install the application.
- Follow the instructions on your screen to install the application.
- Happy Testing! 🥳
2.2 Scenario 2: Internal Testing Group
1.Download the app ‘TestFlight’ on the App Store2. Share a list of Apple IDs (email addresses) for everyone who should have access to the TestFlight version.
⚠️ Beware: Adding users to the Apple Developer Account grants them a certain level of access to your Apple account.
3. Your Customer Success Manager will send out the Apple Developer Account invitations.
4. You will receive an email from Apple. Please accept the invitation.
5. Once the invitation is accepted, your Customer Success Manager can add the users to the Internal Testing Group.
6. You will receive a follow-up email with instructions to add the app to TestFlight.
7. Follow the on-screen instructions to install the application.
🥳 Congratulations! You are now able to test your applications!
3. Apple Automatic Notifications
.png?width=506&height=297&name=Screenshot%202026-02-06%20at%2010.36.48%20(2).png)
If you receive any automatic notifications from Apple about a potential issue with a build, no worries!
Our team reviews and verifies all such messages on our end. These automated alerts are often informational and don’t require any action from you. We’ll proactively handle anything that needs attention and keep things running smoothly, so you can safely disregard those messages unless we tell you otherwise.